Sunday, March 25, 2012

easy and cheap test motivation goodies

I wanted to share some quick
and EASY and
CHEAP
ways to encourage your kiddos
on the upcoming state tests
(just the thought of a state test gives me liver pain... really it does...
I have stress induced liver pain... OUCH)
anywho I wanted my kiddos to know how much I believe in them
SOOOOOOOOOOOO
I came up with these goodies
and thought you guys might want to do these too


snack sized baggie and one bunny peep
gave these to them Friday before they went home
they LUVD them
like {puffy} heart love

yep another cute paperclip
got them from Hob Lob
will give this to them on Monday...
test is Tuesday and Wednesday

little egg and a strip of encouragement
thought of putting in a REAL PEEP
BUT....

no room
they will get this before they leave on Monday


so there you have it...
3 little things
so easy too
all materials were bought at TARGET
see now you have an excuse to head off to TARGET
a teacher's BFF


love Farley

Saturday, November 19, 2011

ornament frame... vintage bling fabulousness

if you like VINTAGE...BLING...& GUADY
you will like this!!!

OK so my sister in law bought my mom in law a really neat frame for her birthday and
I LOVED IT!!!!
but she got it at an auction and paid a small fortune for it soooooo I decided to make my own!!!
Ken, Drew and I headed out to look for ViNtAgE ornaments and accessories.... we found a lot at Thrift town and Hob Lob and my favorite ...Homestead Hand Crafts!! I also bought a frame from the discount aisle at Tues. morning ... it had a HUGE scratch BUT who cares i am going to cover it up!!! I also got lots of glue sticks for my new needle nose glue gun!!! and I was ready!!!


First I emptied out the frame... glass, foam, and faux family pics.... I also nearly cut off my THUMB doing this so BE CAREFUL!!! Glass is SHARP!!!


I laid out most of my ornaments so I could see what I had to work with... make sure you get ALL different sizes of ornaments


I started placing ornaments where i thought I liked them starting with the corners...


and then filling in the rest

at hob lob I bought LOTS of BLING...in all sizes but only in clear...I could use the colored ones but the clear reflects the ornament colors so it worked!!!

see how I used the Bling to fill in where there was awkward space too little for an ornament
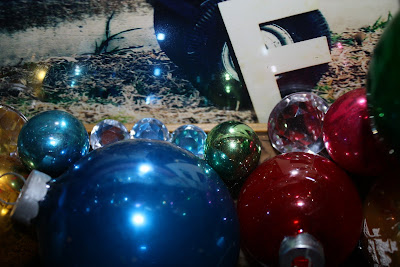
I used some quirky stuff too...like this plastic reindeer


here I used an old candy cane that use to be a pen but the insides were missing
I got the SpArKlY NOEL at Hob Lob in a pack of 4 and just cut the loop off that made it an ornament

I found this Santa in a vintage lot I found at Homestead... i thought he was CUTE!!!
AND
Here it is the FINISHED Frame..
it is VINTAGE... BLINGY... and GAUDY...
I LOVE IT!!!
What do you think?!?!?!
I am going to hit the after Christmas sales and stock up so I can make some for next year!!! can't wait!!!

Sunday, October 9, 2011

Clipboards and Post-its

I think it is a requirement of teachers to...
  1. Love clipboards... and have about 1 million.... you never know when you need one.
  2. Have a near obsession over post-its. Cant they be used for just about anything!?!? Math... yes.... Science... yes... Reading... always.... Love them!
So what's a better way than incorporating the two into a great gift for my Secret Pal at school. She's a teacher.... any by that fact... she must love school supplies. What teacher doesn't??? The smell of crayons... having paperclips in a wide variety of colors... and when paperclips cant work pull out those marvelous big guns.... the bracket clips....

Ahhh yes.... teacher supplies.

So this is what I made for my wonderful teacher friend:
It took me about an hour and a 1/2.... because I am a perfectionist.... but I did all 3 in that time! :) That's 1/2 and hour per gift! (yes... I am a math teacher... )

Here are the supplies I needed:

Lets start with the post-it note holder.... soooooo easy. Get yourself a cardboard coaster from a place like Chili's.
Grab your trusty mod podge. Mine is glossy, but I only used it as a glue.
The secret to all mod podge: some sort of squeegee!!! You must press out all those air bubbles or your paper will crinkle and it will not be pretty.
Use an exacto to carefully cut around the edges of the coaster.
One side was covered in dots, the other in black and white. After I covered both sides, I dipped my brush in black paint and painted the edges and speckled the side as if I were stenciling. I really like the effect.


Then just add a big clip with some post-its and you're done!

Clipboard:
Paint the sides first.
Cut your paper to the size you want. I wanted to use 2 different types of paper.... I started with the bottom and worked my way up.
Mod Podge only the bottom. I used mine only as a glue; I did not put a top layer of it on.
Use that squeegee to get it nice and smooth with no bubbles.
The toughest part was cutting around the silver head area. You could paint the top black and skip all the cutting, but I only wanted it covered in paper.
I used the same painting technique around the board like I did on the coaster. Then add a little bow... so cute!
I used stickers to spell out her name and some kinda paper boarder sticker that I glued on to add a little whimsy to the area where the 2 papers meet. The back of the board looks close to he same as the front. Only difference is I didn't add her name to the back.
Ta-Da! Done. And if you want to know more about the teacher survival kit... you can find that post right here. Or a little more about secret pals.... you can check here.

Have fun crafting.... and if you don't have a secret pal, maybe make something special for that wonderful custodian or secretary who we all know the school would burn down if we didn't have either of them :)

Tuesday, October 4, 2011

Fall Decor

So, it's really hard for me to get in the "Fall" mood because Florida doesn't get cool enough or have the pretty trees.....yes, we cool down but it takes forever!!!!  Anyway, I try to get inspired and decorate anyway:)  I struggle with going to the store and buying already put together swags, and things because a) they usually are pretty pricey and b) they usually aren't exactly what I like.  So, I go to Michaels and buy separate pieces of foliage that I like and then break them apart to put around my house.

I am quite impressed with how real these leaves look.

Magnolia leaves that I pulled apart into smaller sections.

Branches of seed pods that I also pulled apart.

Gourds or pumpkins.  I had some that looked real but saw these at Ross and had to have them cuz they have glitter and they match my napkin rings I got at Pier One.

 Once you have all the different pieces, start layering.  I start with the biggest things first and then just add, tucking and layering as I go.  Then when it's time to put it away and get out Christmas, just put them back in their "piles" and they are ready for next fall.
Yes, that's a pumpkin on a candlestick....weird but I kinda like it.

That's a big twig pumpkin in the middle...

Happy Fall all!!

Monday, September 26, 2011

Brought to you by the one and only
!!!!!

My exclamation marks look ridiculous next to that gigantic word.  
What am I blogging about???  Ahhh yes.... my googly eye picture frame!  So my school does "Secret Pals" for teachers at school.  You fill out a simple questionnaire and then give it to the "head person in charge."  She goes around with all the questionnaires (folded up so no one can see) and you draw one of the papers and that is your secret pal.  Then you send weekly little gifts to your pal with little notes encouraging them for the week or day.    Did any of that make sense?  Anyway... on the question asking "what do you collect?" my pal said "frames."  
So the light bulb went off and I decided to make her a picture frame similar to 


Easy easy easy.  I found a frame a Hobby Lobby for 50% off... so I spent $5.00
I placed the different size eyes first in a small area.
Using one of the best inventions of all time... the hot glue gun.... I hot glued my googly eyes onto the frame.
I used 3 different sizes.  There was one smaller eye but my friend reminded me that I was likely to burn the crap out of myself if I used the tiny eyes.  I am sure she is 100% correct.
After the googly eyes were glued on, I found some lime green card stock and some of my favorite sticker letters.  I cut the card stock to fit and spelled "EEK!"
The finished product!  I really like how the eyes even lose the googly eye look and become a pattern.  

I want to sneak it into her room, but I'll probably drop it by the office and ask the secretary if she could have an office helper deliver it to her.  

SO excited for her to get this gift!!!

Happy blogging and crafting!